

Framing and mounting applications including plaques are commonly finished using mechanical presses and vacuum presses. Framing applications may feature multi-layered surfaces mounted together with a dry mount tissue and protected by a Finish Guard™ vinyl laminating film from D&K.
D&K Recommends the following adhesive and laminating film products for framing applications:
Dry Mounting Adhesives/Tissues (Thermal Mounting Adhesives):
- BufferMount® – Reversable tissue compatible with most substrates.
- Fusion 4000® – Clear adhesive for textured surfaces.
Click Here for More Information on Dry Mounting Adhesive Tissues
Laminating Films:
-
Finish Guard™ Gloss: Available in 41″ x 50′ rolls (pre-perforated)
- Finish Guard™ Satin Matte: Available in 41″ x 50′ rolls (pre-perforated)
- Finish Guard™ Canvas: Available in 41″ x 50′ rolls (pre-perforated)
- Finish Guard™ Suede: Available in 41″ x 50′ rolls (pre-perforated)
Click here to download instructions for using Finish Guard™ Laminating Films
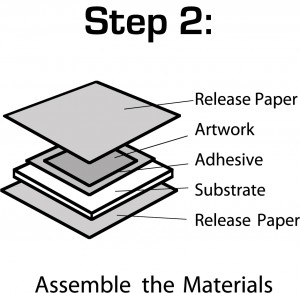
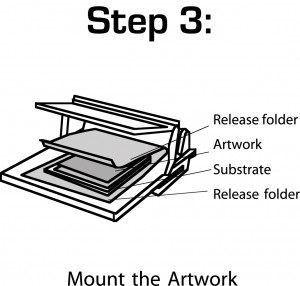
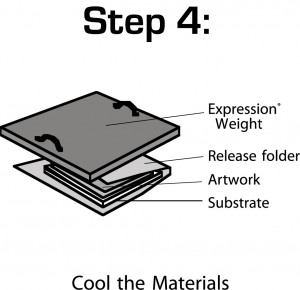
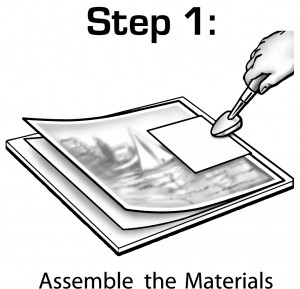
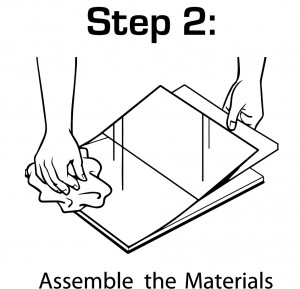
Artwork is mounted to a substrate including foam board, mat board, wooden plaque, etc. using the following steps:

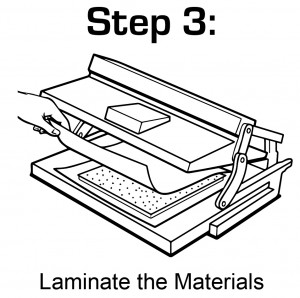
A protective Finish Guard™ laminating film can also be applied to a document or print with the following process:

For more information or technical assistance, contact D&K Framing Products toll-free at 888-240-6021.


